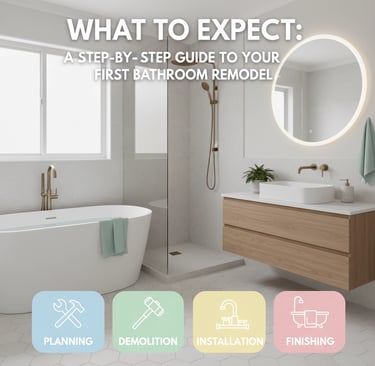
What to Expect: A Step-By-Step Guide to Your First Bathroom Remodel
Planning your first bathroom remodel? You're about to embark on one of the most rewarding home improvement projects that can significantly boost your property value and daily comfort. But here's the thing: doing it right the first time will save you thousands of dollars and years of frustration down the road. Too many homeowners rush through bathroom renovations with quick fixes and budget shortcuts, only to find themselves dealing with water damage, failed fixtures, or outdated design choices within a few years. This comprehensive guide will walk you through every step of the process, helping you make smart decisions that create a bathroom you'll love for decades.
10/12/20255 min read
Step 1: Planning and Budgeting (3-4 Weeks)
Before you swing a single hammer, invest serious time in planning. This isn't just about picking pretty tiles: it's about creating a roadmap that prevents costly mistakes and change orders later.
Start by establishing a realistic budget that includes a 20% contingency fund. Bathroom remodels have a sneaky way of revealing hidden problems like rotted subflooring or outdated electrical systems. Having that buffer means you won't be forced into cheap, temporary fixes when surprises arise.
Take detailed measurements of your space and consider how you actually use your bathroom. Do you need double sinks? Is that bathtub just collecting dust? Think about your morning routine, storage needs, and any accessibility concerns for the future.
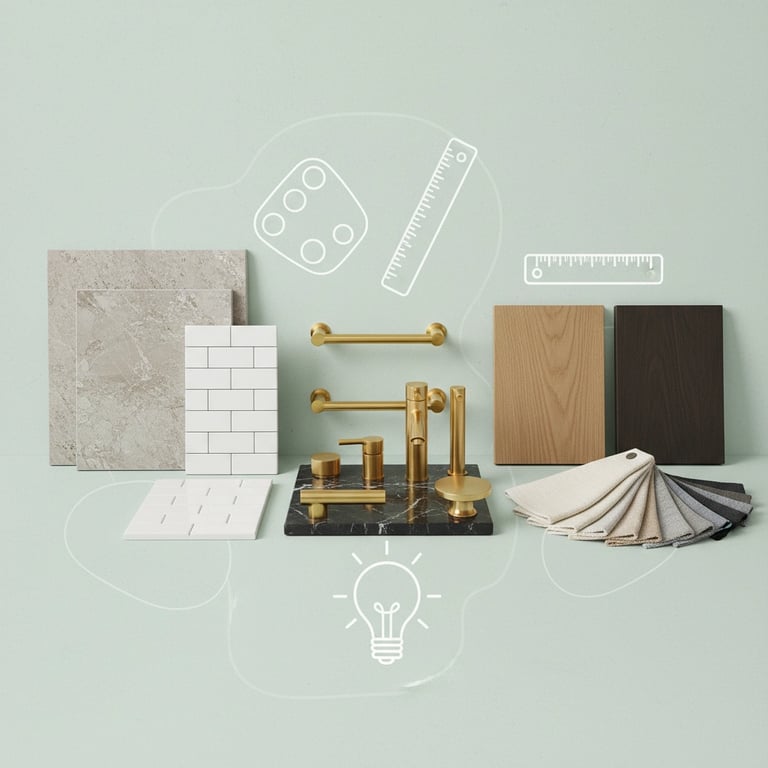
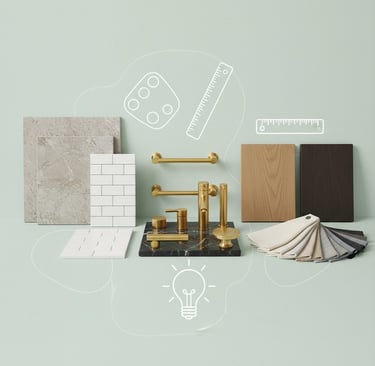
Step 2: Design Decisions That Last
Here's where many first-time remodelers make expensive mistakes. They choose trendy materials or layouts without considering long-term functionality and maintenance.
Focus on timeless design elements for major components like tile patterns and fixture placements. You can always update paint colors, hardware, and accessories later. Choose quality materials that can handle daily wear: natural stone, ceramic tile, and solid wood vanities might cost more upfront, but they'll look great and function well for 15-20 years.
Consider the flow of your space carefully. Wall-mounted fixtures like floating vanities can make small bathrooms feel more spacious, but make sure you have adequate storage elsewhere. Plan generous storage for toiletries, towels, and cleaning supplies: you'll thank yourself later.
Step 3: Permits and Professional Consultations (2-6 Months)
Don't skip the permit process, even if it seems like a bureaucratic hassle. Permits ensure your work meets local building codes and protects you during future home sales or insurance claims.
This is also the time to bring in professionals for consultations, even if you're planning to DIY some portions. A plumber can identify potential issues with your existing rough-in work, and an electrician can ensure your lighting and ventilation plans meet code requirements. Getting professional input during planning costs far less than calling them for emergency repairs later.
Step 4: Demolition Done Right
Demolition might look like the fun, sledgehammer-swinging part of renovation, but approach it systematically to avoid creating bigger problems.
Start by shutting off water and electrical supply to the bathroom. Remove fixtures in reverse order of installation: mirror and accessories first, then vanity, toilet, tub or shower, and finally flooring. Take photos before you start demolition to document plumbing and electrical locations.
Wear proper safety equipment and rent a dumpster sized appropriately for your project. Trying to save money with multiple trips to the dump just extends your timeline and increases frustration.
As you remove materials, inspect what's behind them. This is your chance to spot water damage, outdated wiring, or structural issues that need addressing before you move forward.
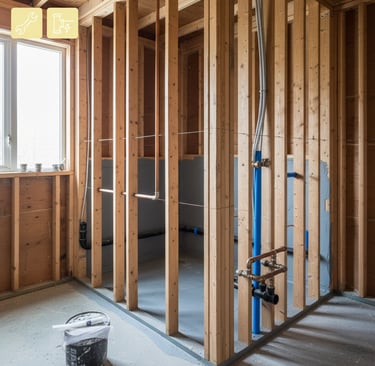
Step 5: The Invisible Foundation Work
Once demolition is complete, focus on the systems that make everything else work properly: plumbing, electrical, and structural elements.
If you're moving fixtures or adding new ones, now's the time for rough plumbing work. Don't cut corners here. Proper pipe sizing, correct slope for drainage, and quality fittings prevent leaks and water pressure problems that could plague you for years.
Update electrical systems to current codes, especially if your home is older. Modern bathrooms need adequate lighting, ventilation fans, and GFCI outlets in the right locations. This isn't the place to "make do" with existing wiring.
Address any structural issues you discovered during demolition. Replace rotted subflooring completely, fix framing problems, and ensure proper support for heavy fixtures like tile surrounds or large vanities.
Step 6: Waterproofing and Insulation
Here's where quality work really pays off long-term. Proper waterproofing prevents the water damage that destroys bathrooms and leads to expensive repairs.
Install vapor barriers behind shower walls and around tubs. Use appropriate waterproof membranes under tile floors, especially in wet areas. Don't skip this step or try to save money with inferior materials: water damage repairs cost far more than doing waterproofing right the first time.
Add proper insulation in exterior walls to prevent condensation issues and improve energy efficiency. Good insulation also reduces noise transmission, making your bathroom more peaceful.
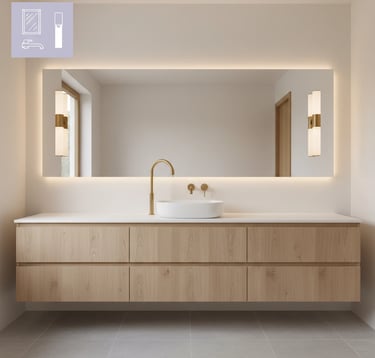
Step 7: Major Fixture Installation
Install your tub or shower first, as these are the largest components and often require the most precise fitting. If you're upgrading to a larger shower or different tub style, double-check measurements before installation because returns on plumbing fixtures can be complicated and expensive.
Choose fixtures that match your quality standards for the rest of the project. A beautiful tile job looks cheap when paired with builder-grade fixtures that will need replacement in a few years.
Step 8: Flooring and Wall Finishes
Install flooring before the vanity but after major plumbing fixtures are in place. This order prevents damage to finished floors while allowing proper fitting around permanent fixtures.
For wall finishes, invest in quality materials and installation. Cheap paint or poorly installed tile shows its age quickly in a high-moisture environment like a bathroom. Use bathroom-specific paints and primers that will ensure proper surface preparation for lasting results.
Step 9: Final Fixtures and Details
Install your vanity, mirror, lighting fixtures, and accessories. This is where attention to detail really shows. Take time to ensure everything is level, properly secured, and functioning correctly.
Test all plumbing fixtures thoroughly before calling the job complete. Run water for extended periods to check for leaks, test drainage, and ensure adequate water pressure at all fixtures.
Step 10: Quality Control and Maintenance Planning
Before you celebrate, conduct a thorough walkthrough of your completed bathroom. Check for any gaps in caulking, test all fixtures and electrical components, and address any minor touch-ups needed.
Document your renovation with photos and keep receipts for all materials and professional services. This documentation helps with warranty claims and adds value during future home sales.
Create a maintenance schedule for your new bathroom. Regular cleaning, caulk inspection, and prompt attention to minor issues will keep your renovation looking and functioning great for years to come.
When to Call the Professionals
While some bathroom renovation tasks are DIY-friendly, others require professional expertise. Don't risk your investment by tackling plumbing or electrical work beyond your skill level. Moving plumbing lines, installing new electrical circuits, or working with structural changes should involve highly experienced professionals.
Remember, this is likely your most important home improvement investment. Taking the time to do it right: with quality materials, proper planning, and professional help where needed: creates a bathroom that serves your family beautifully for decades.
Your first bathroom remodel sets the standard for future projects. Make it count by prioritizing quality over quick fixes, and you'll enjoy the results every single day.
Need help planning your bathroom remodel or have questions about which tasks require professional expertise? The experienced team at The Heartfelt Handyman can guide you through the process and ensure your renovation is done right the first time. Contact us for a consultation and let's create the bathroom of your dreams.